Quail breeders know how important it is to provide birds with good living conditions, including convenient equipment. One of the essential elements of their maintenance is a well-organized drinking bowl. Of course, you can buy a finished one at a pet store, but it’s much nicer and cheaper to make a drinker yourself from available materials.
Basic requirements for quail drinkers
Water equipment should:
- be reliable and easy to use;
- provide birds a free approach to water;
- be made of safe materials;
- easy to pull out, wash and disinfect;
- have enough volume for the whole livestock.
Did you know? I AMquail eggs are used to strengthen immunity and quickly recover from serious illnesses. And bodybuilders use them to build muscle.
Types of drinkers
Drinking bowls for birds are divided into several types:
- Open. Represent any separate capacities. Advantages - simplicity, accessibility. Cons - easy to tip over, chicks can drown, liquid contaminated by food fragments.
- Nipple or drip. They look like a horizontal pipe equipped with a nipple. Arranged according to the principle of a washstand, water enters with pressure on the nipple tip. Pros - durability, water is supplied automatically and does not stagnate. Cons - financial costs, the need for a soft nipple for small birds.

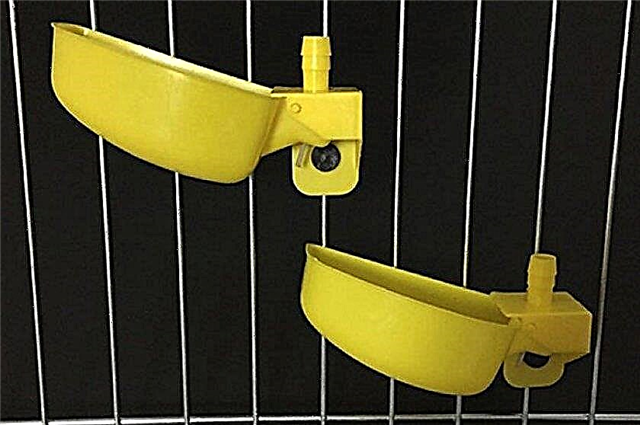
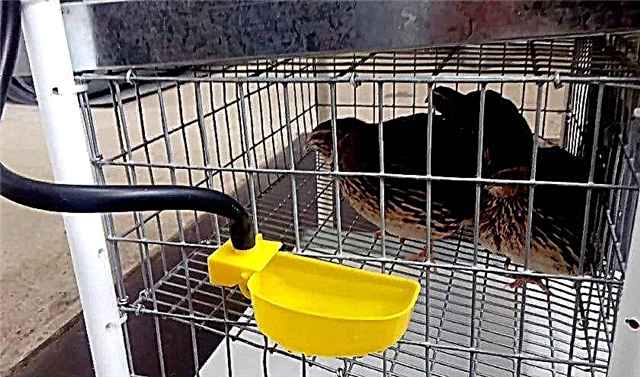
- Cup.They look like a cup with a floating tongue and a ball that blocks the flow of fluid. Arranged by analogy with the scales, when a full bowl under its weight goes down and closes the water. The empty container creeps up, the ball also rises and water is again fed into the bowl. Advantages - convenience, automatic operation, suitable for chicks. Cons - a difficult design, financial costs.
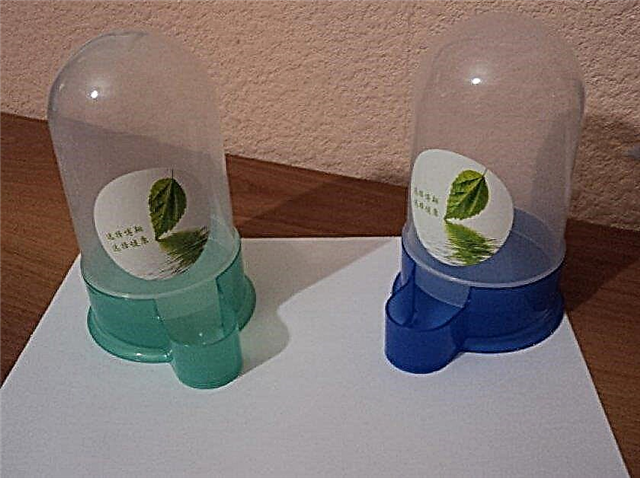
- Vacuum They work on the basis of the pressure difference in the tank with water and outside. Pluses - automatic operation, the water remains clean, ideal for daily quail.
- Automatic. Commonly used on large farms. Water comes fully automatically. Pluses - lack of need to control water supply.
How to make a quail drinker with your own hands
Drinking bowls have a rather simple design without complex knots and details, so even an inexperienced master will cope with it. In addition, a homemade drinker can be made from completely accessible materials and residues from other works.
Cup
Materials and tools for work:
- plastic cup (volume 200–250 ml);
- plastic water tank;
- pieces of plastic plumbing pipes (d = 20 mm, d = 50 mm);
- expanding spring (height - 5 cm, d = 20 mm);
- steel rod (length - 5–6 cm, d = 4 mm);
- plywood pads (2x2 cm);
- caps and fixtures for pipes;
- silicone gasket;
- drill (d = 5 mm);
- wood screws.
Did you know? Well-known perfume brands often use quail eggs in their creams and shampoos. The fact is that these eggs contain tyrosine - the amino acid responsible for a good complexion. Many lovers of natural remedies consider her the real secret of youth.
Step-by-step instruction:
- Fasteners are attached to the cup with screws with plywood gaskets so as to get a horizontal hole for moving the cup.
- A plug is inserted into a piece of pipe (d = 50 mm) 20–25 cm long, where a central hole of 20 mm is drilled. In this case, the burrs of the plug should not go out.
- To fix the axis of the movable bowl, slots are made in the pipe. The pipe is arranged in the selected place of the house or cage, its top is closed with a plug.
- A spring is installed in it. A gasket is glued to the bowl fasteners.
- A cup is mounted on the axis in the form of a steel rod. The pipe (d = 20 mm) is hermetically soldered to the top of the plug.
- This pipe joins the water tank located above. The cup drinker is ready.
 In addition, a tap and a disconnecting hermetic clamp are installed in the pipe of a smaller diameter so that the tank can be removed and cleaned. If several bowls are needed, then first their places in the house or cage are outlined. Then, all the thin tubes from the cups with adapters are connected to a common tube leading to the water tank. Cup containers are small, so they are often called microcups. Drinkers of this type are usually suitable for young animals.
Important! The water source is an upstream three-liter jar with an iron cap for a thread in which a hole has been made for a fitting. As a result, the drinker functions by creating a vacuum in the bank.
From plastic pipe
Materials and tools for work:
- plumbing plastic pipe (length - 50 cm, d = 50 mm);
- two plastic containers (5 l);
- disposable syringe (5 mm);
- PVC hose;
- glue gun;
- hole saw;
- soldering iron;
- sharp knife.
Step-by-step instruction:
- Cut off the necks of plastic 5-liter bottles and use them as plugs at the ends of the pipes. For tightness, place the necks on the hot glue with a glue gun.
- Wait until the glue dries, then mark the holes of the drinking bowl (the diameter of the holes is 3 cm, the distance between the centers is 4 cm) and drill them with a hole saw.
- Strip the edges of the holes with a thin knife. At the end of the pipe with a soldering iron, make a hole for the pipe to supply fluid. It is convenient to first half-insert a disposable syringe cut from both sides, onto which then put the pipe.
- The drinking bowl is ready to use. For its periodic cleaning, unscrew the covers on the ends and rinse the drinker with a brush under running water.
Video: how to make a drinker from a plastic pipe with your own hands
Vacuum from a plastic bottle
Materials and tools for work:
- two plastic bottles (1–1.5 l);
- sharp knife.
Important! For a homemade vacuum drinker, it is most convenient to choose ribbed bottles of square section. It is easier to work with them and fix on the wall.
Step-by-step instruction:
- At the bottom of one bottle, cut a small window 3 cm high so that it occupies half the circumference of the container.
- In the same bottle, with a knife, separate the upper part with the neck. Insert the second bottle into the resulting hole with the neck forward to the end.
- Before that, make a hole in the neck of the second bottle at the level where the water should be. Instead of a knife, you can use a hot nail, a soldering iron, a screwdriver or a drill.
- Pour water into the second bottle and fix the entire structure on a vertical surface in any way, for example, with rubber bands. The drinking bowl is ready to use.
Video: how to make a vacuum drinker from a plastic bottle with your own hands
Automatic
Materials and tools for work:
- plastic plumbing pipe;
- wine bottle cork;
- a piece of dense foam;
- a piece of wire made of aluminum or copper;
- a piece of rubber or a stationery eraser;
- a piece of window seal;
- an empty ballpoint pen with a sharp tip;
- rubber glue;
- nail;
- sharp knife.
Important! The length of the drinker depends on the number of livestock and the size of the cage. It is better to make it 12-15 cm longer so that the quail does not reach the mechanism of the device and does not damage it.
Step-by-step instruction:
- Fold the wire in half and screw both halves onto the nail. The result is a “swing” that easily rotates on a nail.
- Insert a piece of elastic into the bent part of the structure so that the wire compresses it well. Cut off excess rubber with a knife.
- Make two small holes in the cork and insert the legs of the wire structure.
- Cut the pipe lengthwise and glue a piece of foam into one of the ends of the resulting groove. Solder the second end using a piece of plastic.
- Drill a hole in the pipe 3-4 cm from the foam.
- Cut the handle into three parts - two equally small and one longer with a nose.
- Insert the nail from the structure with the wire into the hole and put on a small piece of the handle. Next, put a “swing” on the nail, then a second small piece of the handle and pull the tip of the nail into the opposite hole.
- Make a hole in the foam at the level of the structure and insert a long piece of the handle with the tip inside the “gutter”. To the second end of the handle, connect the tube for supplying fluid from the tank.
- After reaching the set liquid level in the drinking bowl, the cork will rise and block the hole. Water will cease to be supplied.
Video: how to make an automatic drinker do it yourself
Installation of drinkers in a cage
Equipment for water must be installed so that birds can have a free approach to it, and the owner - the ability to service it. In addition, feed and water are best placed at different ends of the house or cage so that the feed does not enter the water and contaminate it. It is better to fix the drinker to a grid or wall so that the quail does not turn it over.
Recommended Reading

Regardless of whether this is a drinker or a homemade one, you need to take good care of it. Only clean and fresh liquid should be in the drinker, so it should be changed as it becomes soiled.
The frequency of replacement depends on the room temperature. In a warmer place, the water is more likely to deteriorate and pathogenic microbes develop in it, so in summer it is better to change the water in containers several times a day.
The depth of the open drinking bowl should not be large, especially if the house is intended for growing chicks. Periodically, the equipment is cleaned and disinfected. You can disinfect it with ash ash, while 200 g of ash is taken per liter of water. Before use, the ash solution should be boiled and diluted with water in a ratio of 1: 5.
What water to give quails
Birds need constant access to clean and fresh water. Do not pour them too cold liquid, before serving it needs to be slightly warmed up. Some drinkers may get leftover food or pieces of litter, so the water should be changed periodically, in open containers - 2-3 times a day. This is not to say which drinkers are better or worse. Their choice depends on many factors, including the size of the livestock, age and type of keeping of birds. Do-it-yourself drinking bowls will allow you to use improvised materials and save money. Most often, such equipment is used for keeping birds in private courtyards or small farms.


